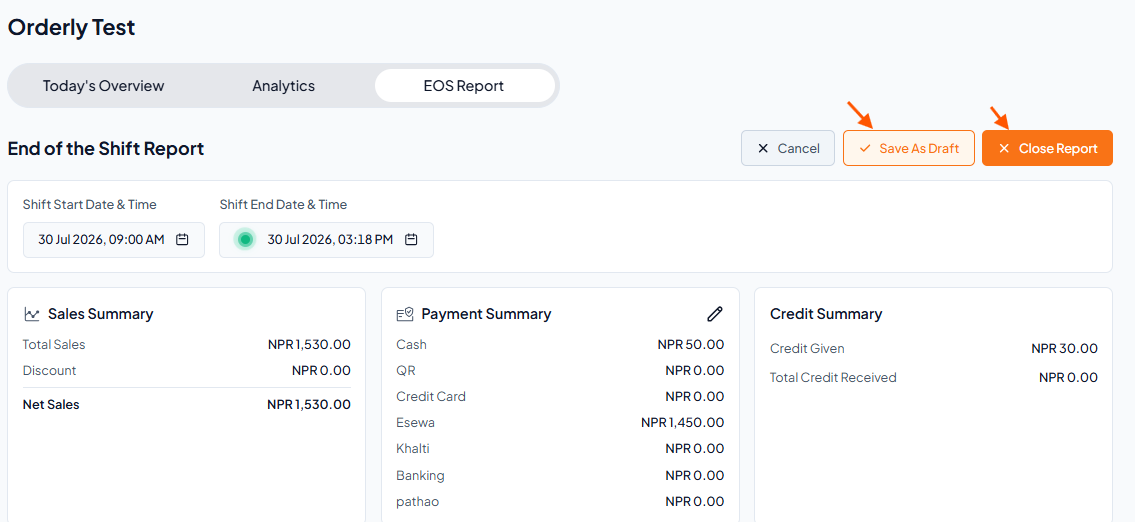
It helps track daily business performance, verify cash and payments, and ensure all records are accurate at the end of the shift.
Sales Summary, Payment Summary, Credit Summary, and Item-wise Sales are calculated from completed orders within the shift hours.
Expenses are recorded if added during the shift time.
Cash Summary, Cash Received and Cash Expense are automatically updated based on orders and expenses within the shift hours.
Step 1: Open EOS Report
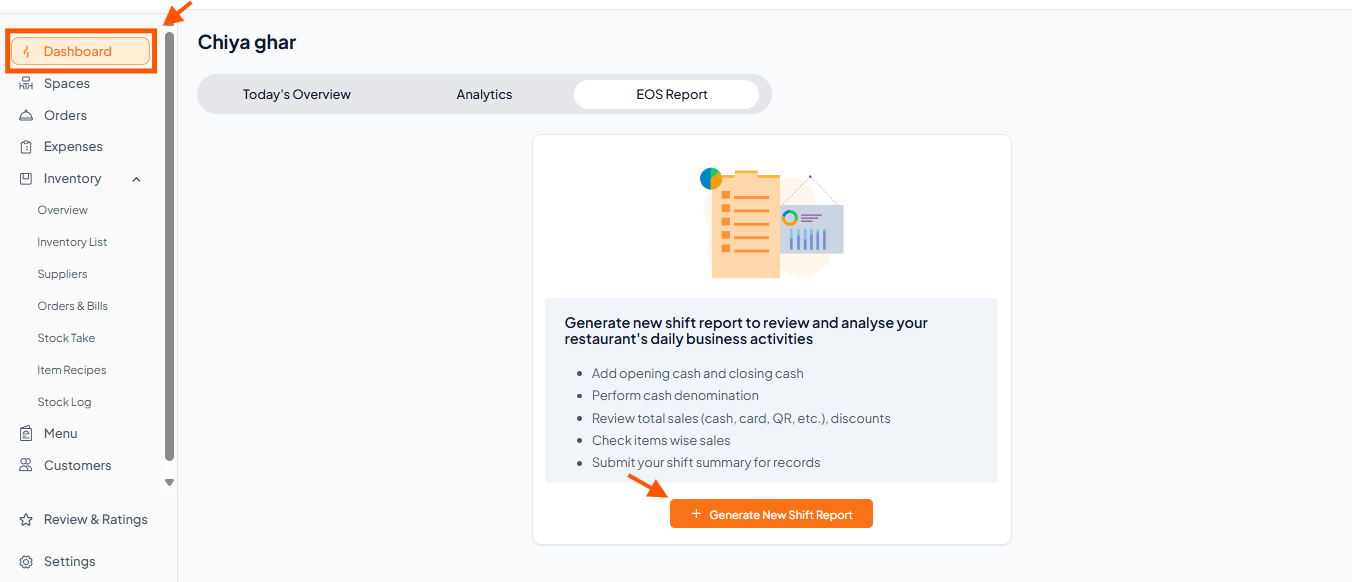
Go to the EOS Report tab from the dashboard.
Click "Generate New Shift Report"
Step 2: Check Shift Time
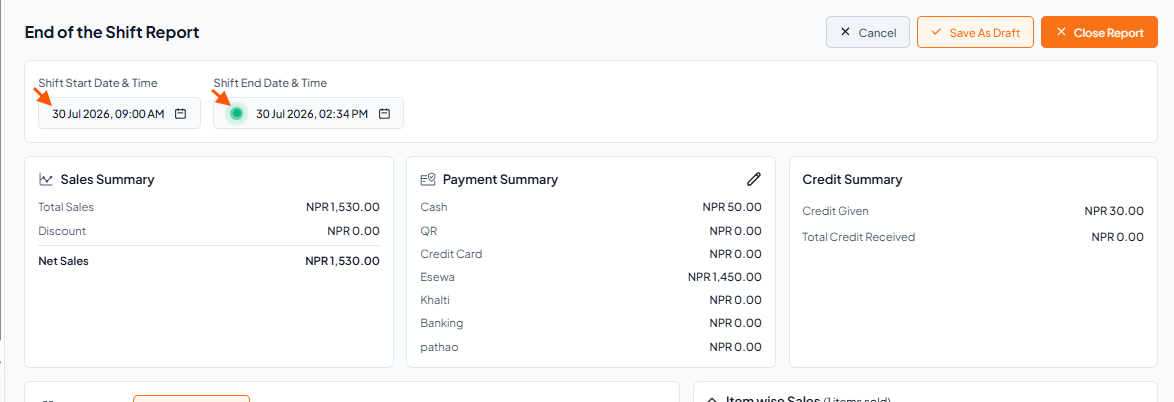
Shift Start Time: Set automatically when first generated.
Adjust if sales were made before this time.
Shift End Time: Green indicator shows the shift is active.
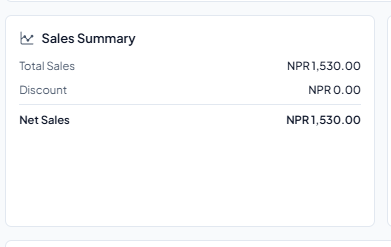
Step 3: Review Sales Summary
Shows Total Sales, Discount, and Net Sales automatically.
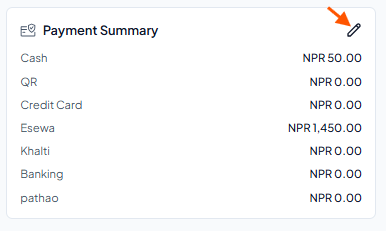
Step 4: Review Payment Summary
Shows payments by method (Cash, QR, Card, etc.).
Use ✏ to correct wrong entries.
Note: Total payment cannot exceed total sales.
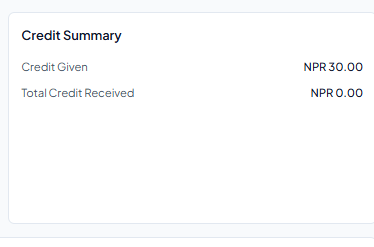
Step 5: Review Credit Summary
Records update automatically when orders are completed and show credit details.
Step 6: Add Expenses
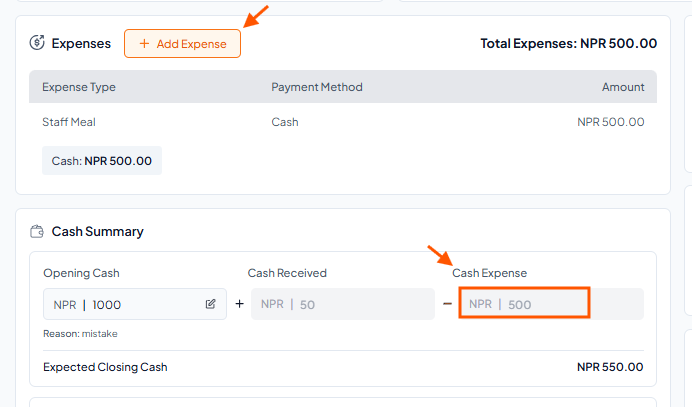
Tap + Add Expense for expenses during the shift.
Expenses added from the expense section within shift time are automatically recorded here.
If cash payment is made, your total cash on hand will decrease accordingly – you can see this reflected in the Cash Summary (Cash Expense) (refer to image).
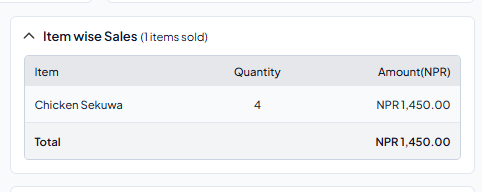
Step 7: Check Item-wise Sales
Quantities and amounts sold are shown
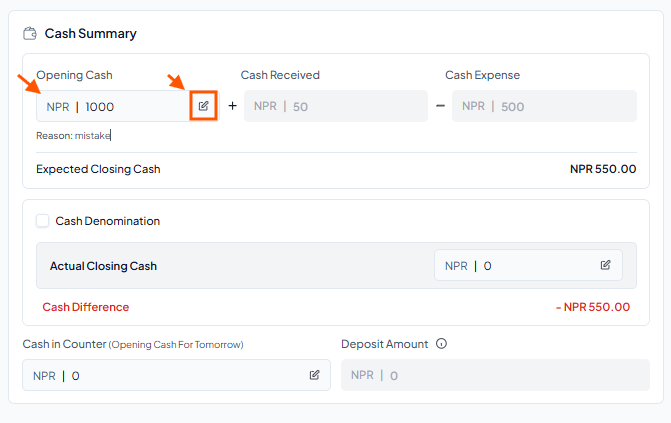
Step 8: Fill Cash Details
Enter Opening Cash (cash kept at the start of the day).
Cash Received and Cash Expense are added automatically from completed orders and recorded expenses.
Expected Closing Cash is calculated automatically.
(Note: You can edit Opening cash clicking edit icon)
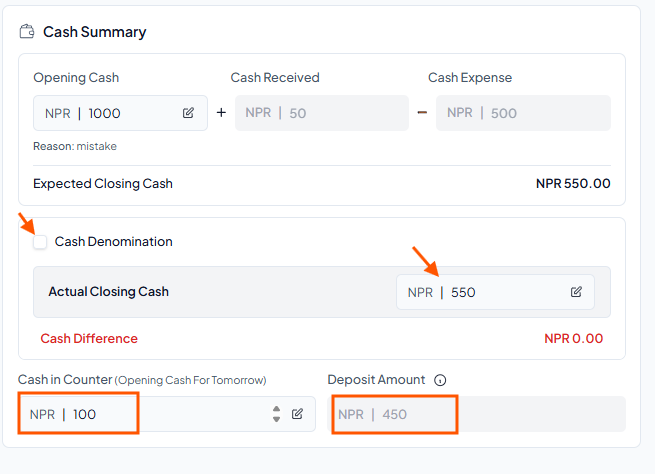
Step 9: Enter Actual Closing Cash
Done while closing the restaurant.
Count the cash in the drawer and enter the total.
Two ways to enter:
Direct Entry: Manually enter the total amount.
Cash Denomination: Tap Cash Denomination and add amounts by notes/coins for accurate counting.

Step 10: Close or Save Report
Click "Close Report" to finish or "Save as Draft" to continue later.
Closed reports cannot be edited.