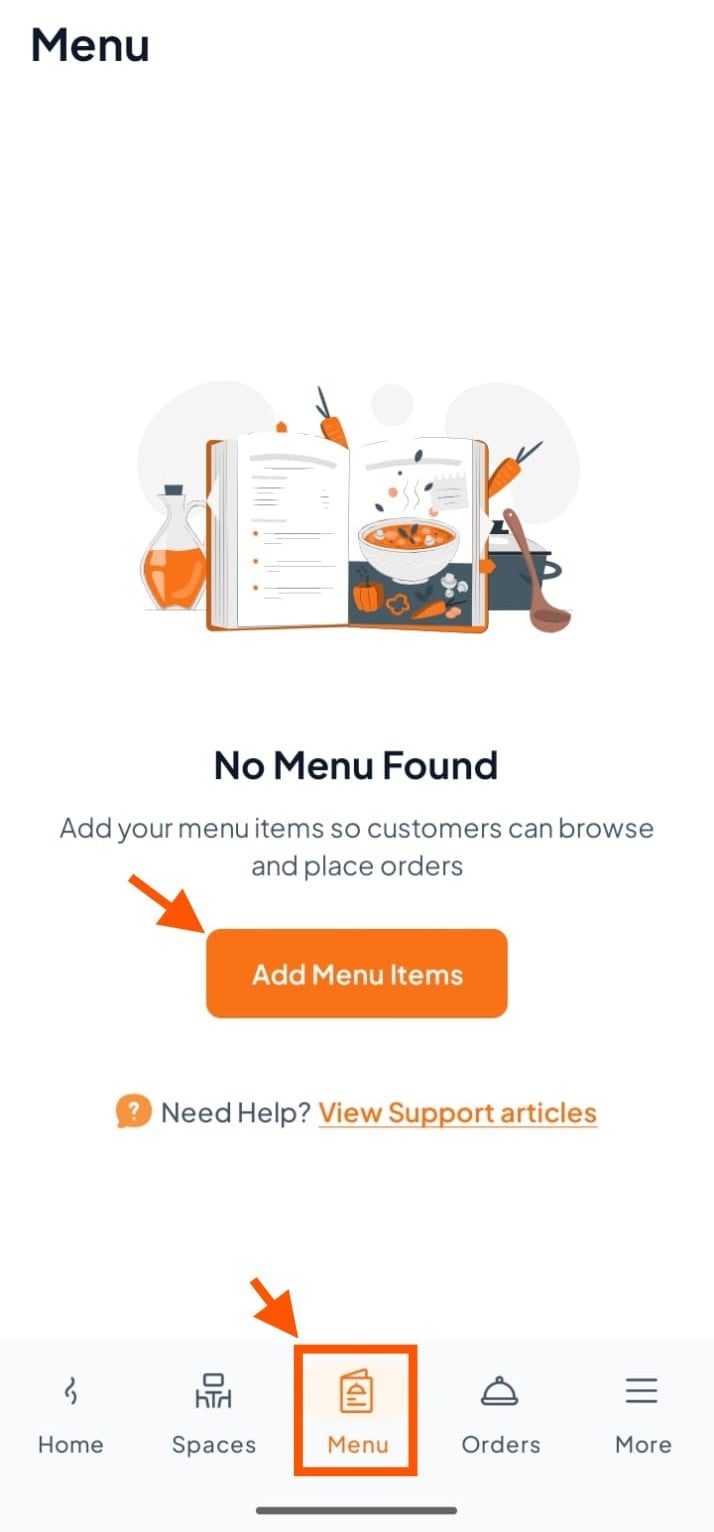
Step 1: Go to the Add Menu Items Section.
From your Orderlay dashboard, go to the "Menu" section.
Click "Add Menu Items"
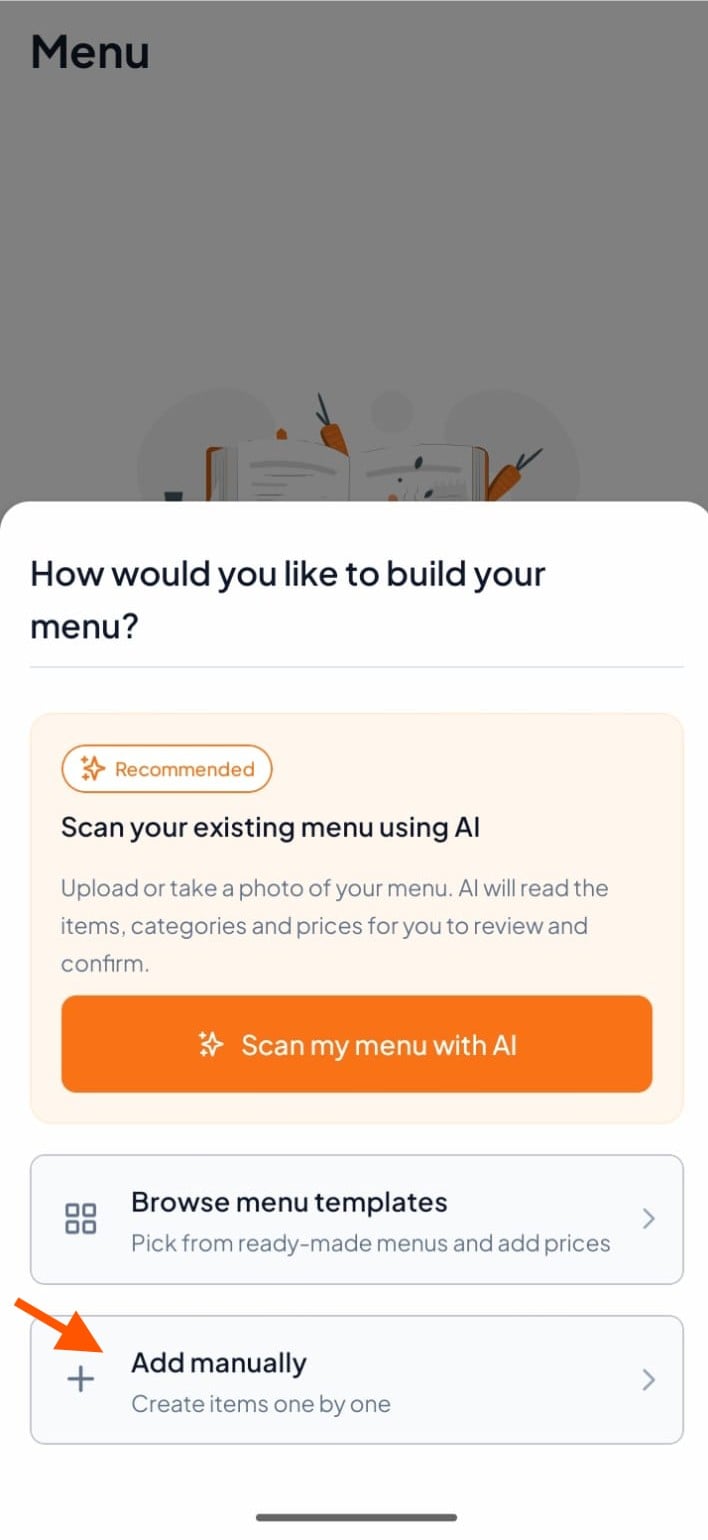
Step 2: Click "Add Manually"
Step 3: Enter Basic Item Details
Update Menu Image – Learn how to update your menu item images.
Menu Categories – Learn how to create and manage categories.
Set Prices - Learn how to set your item’s pricing.

Step 4: Add Description & Dietary Info:
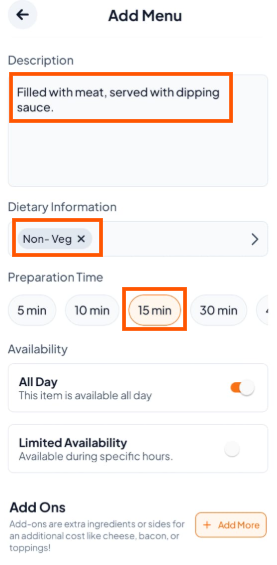
Description: Write an appealing summary (e.g., "Filled with meat, served with dipping sauce").
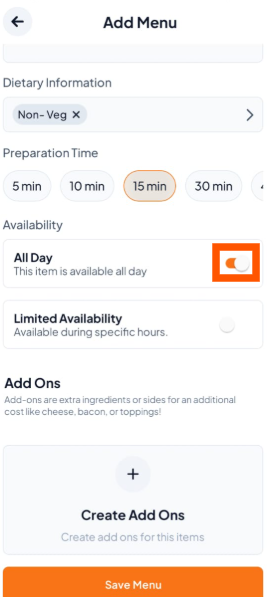
Dietary Information: Select the appropriate tag (e.g., Non-Veg).
Preparation Time: Set how long it takes to prepare (e.g., 5 min, 15 min).
Step 5: Set Item Availability
Available All Day: Turn on the button to make the item available during all business hours.
Limited Availability: Set specific start and end times for when this item can be ordered.

Step 6: Set Up Add-Ons (Optional)
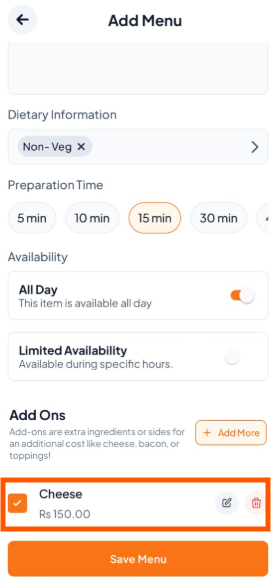
Click Add-Ons to see how to set up extras like cheese, sauces, or other options.
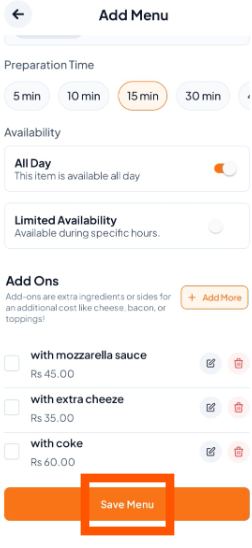
Step 7: Save the Menu Item
Tip: Repeat this process for each new item.